On this page
On this page
- Why does attic insulation fail?
- Sign 1: Your energy bills keep climbing
- Sign 2: Rooms are different temperatures
- Sign 3: You can see the insulation is damaged
- Sign 4: Animals have been in the attic
- Sign 5: Your home was built before 1990 and has never been upgraded
- How to check your attic insulation yourself
- What does professional insulation replacement involve?
- Step 1: Removal of existing insulation
- Step 2: Attic floor inspection and remediation
- Step 3: Air sealing
- Step 4: Installation of new insulation
- Frequently Asked Questions
- The Bottom Line
Attic insulation typically needs replacing when it is older than 15 to 20 years, visibly damaged, contaminated, compressed, or no longer has enough clean, dry depth to do its job. The five most common warning signs are rising energy bills, uneven room temperatures, visible moisture damage, pest contamination, and settled or compressed material that no longer fills the joist bays.
If you have not been in your attic lately, that last paragraph should be reason enough to grab a flashlight and pop the hatch. Insulation does not announce its retirement. It just quietly stops working, and your HVAC system picks up the slack at your expense.
This guide covers why insulation fails, the five warning signs that tell you it is time for replacement, how to inspect your attic yourself, and what a professional replacement actually involves.
Why does attic insulation fail?
Insulation is not permanent. It degrades over time through a handful of predictable mechanisms, and understanding those mechanisms helps you recognize the signs when they show up.
Age and material degradation. Every insulation material has a functional lifespan. Fiberglass batts lose loft and resilience over 15 to 25 years as the glass fibers break down. Blown-in cellulose settles under its own weight, losing an estimated 10 to 15 percent of its installed depth within the first few years, with continued settling over the decades. Rock wool (mineral wool) is more durable but still deteriorates, becoming brittle and crumbly after 20 to 30 years.
Compression. Insulation works by trapping air in tiny pockets between its fibers. When insulation gets compressed, whether by stored boxes, foot traffic, or simply the weight of material stacked on top, those air pockets collapse and the R-value drops. Fiberglass batts rated at R-30 when fluffy and full-thickness might deliver R-15 or less when compressed to half their height.
Moisture. This is the silent destroyer. Roof leaks, condensation from bathroom exhaust fans vented into the attic (a code violation that remains astonishingly common in NJ homes), and ice dam melt-back all introduce water into insulation. Wet fiberglass loses virtually all its insulating ability because water conducts heat roughly 25 times more efficiently than still air. Wet cellulose is even worse because it clumps, compresses, and can support mold growth.
Animal damage. Rodents, raccoons, squirrels, and bats affect insulation in different ways. They tunnel through it, nest in it, contaminate it with urine and droppings, and displace it from the areas where it is needed most. A single raccoon can flatten a 10-by-10 foot section of insulation in a matter of days. If you suspect animal activity, the guide on contaminated attic insulation explains when inspection and removal make sense.
Settling. Blown-in insulation, both cellulose and fiberglass, settles over time. The Department of Energy notes that settled insulation may no longer provide the coverage it was designed for, particularly at the eaves and perimeter of the attic where coverage matters most for preventing heat transfer at the building envelope's edges.
Sign 1: Your energy bills keep climbing
The Department of Energy estimates that 25 to 30 percent of the average home's heating and cooling energy is lost through the attic. When insulation fails, that number gets worse, and your energy bills reflect it.
Here is the math that makes this personal for NJ homeowners. According to the U.S. Energy Information Administration, New Jersey residential electricity rates are 35 to 45 percent above the national average. That means every BTU of heat lost through a degraded attic costs you significantly more to replace than it would cost a homeowner in, say, North Carolina or Ohio.
If you are paying $400 or more per month in heating and cooling costs on a 1,500-square-foot home, your attic is very likely part of the problem. That number should be lower for a home of that size, and the attic is the first place to look because it represents the largest surface area of the building envelope exposed to temperature extremes.
A few important caveats. Rising energy bills can also result from aging HVAC equipment, air leaks in the ductwork, or gaps in the building envelope at locations other than the attic. But if your bills have crept up over the past several years without a corresponding change in usage habits or rate increases, degraded attic insulation belongs at the top of the suspect list.
ENERGY STAR estimates that homeowners can save an average of 15 percent on heating and cooling costs by air sealing and adding insulation in attics, floors over crawl spaces, and basements. The attic is the highest-impact location because heat rises, and the attic floor is the largest continuous surface separating conditioned space from unconditioned space.
Sign 2: Rooms are different temperatures
If your second floor is noticeably hotter than the first floor in summer, or certain rooms are persistently colder in winter despite the heat running, the attic above is the most likely culprit.
Your attic functions as the thermal barrier between your living space and the outside air. In summer, attic temperatures in NJ routinely reach 130 to 150 degrees. In winter, the attic approaches outdoor temperatures, which in northern NJ can mean single digits. The only thing standing between those extremes and your ceiling is the insulation.
When insulation has gaps, thin spots, or areas where it has been displaced or compressed, heat transfer becomes uneven. The rooms directly below the worst insulation get the worst temperatures. You end up with the classic complaints: the bedroom over the garage is always freezing, the upstairs bathroom is an oven in July, or one side of the house is ten degrees different from the other.
The thermostat cannot fix this problem. It reads the temperature at one point in the house and runs the system accordingly. If the attic insulation is letting heat pour in above the upstairs bedrooms while the downstairs stays comfortable, the thermostat has no way to address the imbalance. You either overcool the downstairs to get the upstairs comfortable or live with the temperature differential.
Consistent room-to-room temperatures throughout the house are one of the clearest indicators that the thermal envelope is intact. When that consistency breaks down, the attic insulation is the first thing to check.
Sign 3: You can see the insulation is damaged
This one sounds obvious, but most homeowners never look. And even when they do look, they do not always know what degraded insulation looks like because they have nothing to compare it to.
Here is what to look for by insulation type and age:
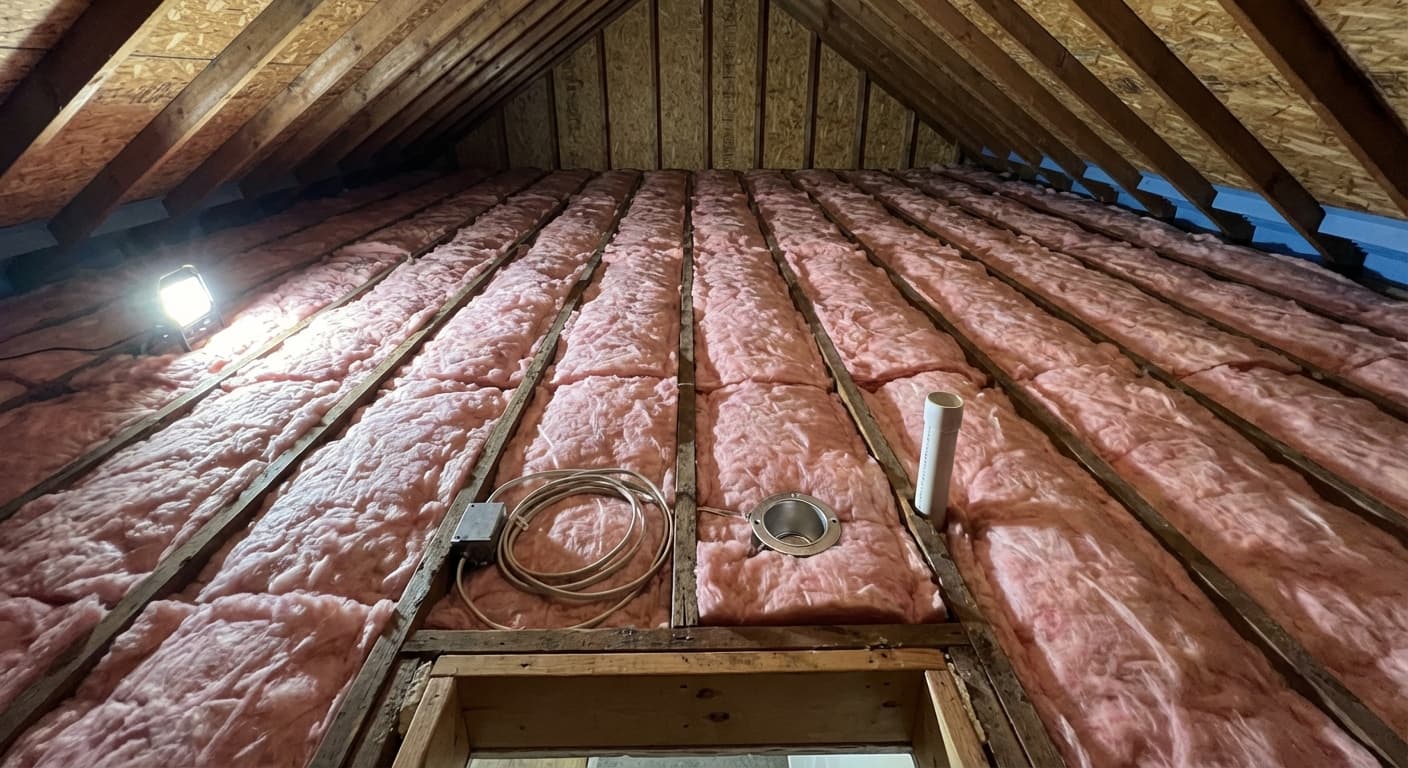
Fiberglass batts (the pink, yellow, or white rolls). When fiberglass is new, it is fluffy and fills the joist bays evenly from side to side. When it is failing, it sags away from the joists, leaving gaps at the edges. It thins out, losing loft until it no longer fills the depth of the joist bay. In severe cases, you can see the tops of the floor joists above the insulation, which means the effective coverage has dropped dramatically. Dark staining on fiberglass usually indicates air movement carrying dust particles through the material (called "ghosting" or "filtering"), which tells you air is leaking through the attic floor beneath it.
Blown-in cellulose (gray, shredded material). Cellulose settles over time. What was installed at 12 inches may now be 8 inches, and the R-value has dropped proportionally. You will notice it looks flat and compacted rather than fluffy. In areas where moisture has reached it, cellulose clumps into hard, dense masses that provide almost no insulating value. If it has turned dark gray or black in spots, that is moisture damage.
Rock wool / mineral wool (dense, gray-brown material). Common in homes built before 1970. When it degrades, rock wool becomes brittle, crumbly, and dusty. It breaks apart when touched rather than springing back. It often has a brownish, scorched appearance in older installations. In some very old homes, rock wool insulation has settled to half or less of its original depth.
General warning signs across all types:
- Visible gaps between insulation and joists
- Thin spots where the joist tops are exposed
- Dark staining or discoloration
- Moisture, dampness, or water marks
- Torn, displaced, or bunched-up sections
- Insulation that crumbles when you touch it
- Mold growth on or under the insulation
Sign 4: Animals have been in the attic
If wildlife has taken up residence in your attic at any point, the insulation is almost certainly compromised. This is not a "maybe" or a "check it and see" situation. Animals destroy insulation in ways that are often far more extensive than what is visible from the attic hatch.
Rodents (mice, rats) create networks of tunnels through fiberglass insulation, compressing it along their travel paths. They urinate and defecate continuously as they move, saturating the material with contaminants that cannot be cleaned out. A mouse infestation that has been active for even a few months can contaminate the insulation across the entire attic.
Raccoons are heavier and more destructive. They flatten large sections of insulation as they walk across it, tear it apart for nesting material, and create concentrated latrine sites where they repeatedly defecate. The contaminated zone around a raccoon latrine extends three to four times beyond the visible droppings because raccoons track fecal material on their paws.
Squirrels pull insulation apart to build nests, often creating basketball-sized cavities in the material. They also cache food in the insulation, which attracts secondary pests and introduces organic matter that breaks down.
Bats can leave affected material in and around the insulation below active areas. The real work depends on what the inspection documents, not what is visible from the attic hatch.
The critical point: insulation is porous. Unlike a hard surface, it cannot be cleaned, sanitized, or restored after animal contamination. The contaminants are not sitting on the surface. They are absorbed into the fibers. The insulation must be removed and replaced. That removal-to-bare-deck step is an attic cleanout.
The detailed guide on contaminated attic insulation covers when old material needs to come out and why porous insulation cannot be cleaned like a hard surface.
Sign 5: Your home was built before 1990 and has never been upgraded
Attic insulation practices have changed dramatically over the past 40 years, and the gap between old shallow installs and a properly sized existing-home upgrade can be significant.
Here is a rough timeline of typical attic insulation depth in NJ residential construction:
- Pre-1970: R-11 to R-19 was common. Many homes had as little as 3 to 4 inches of rock wool or early fiberglass. Some had no attic insulation at all.
- 1970s to 1980s: R-19 to R-30 became more common as energy costs spiked during the oil crises. Blown-in cellulose gained popularity during this period.
- 1990s to 2000s: Deeper attic insulation became more common in new construction and energy-conscious retrofits.
- Current guidance: New construction and code-driven projects have different insulation targets than existing-home retrofit work. For an existing attic, the right target depends on current depth, air sealing, ventilation, access, and material condition.
If your home was built before 1990 and the insulation has never been upgraded, it may be shallow by modern comfort and efficiency expectations. Even if the insulation is in good physical condition (not degraded, not damaged, not contaminated), it may be providing significantly less thermal protection than the house needs today.
The gap between a typical 1970s installation and a properly sized modern upgrade can be meaningful. That does not mean every existing home automatically needs R-49. It means the attic should be measured and sized instead of guessed.
How to check your attic insulation yourself
You do not need a professional to do a preliminary assessment. A 15-minute visual inspection can tell you a lot about the current state of your attic insulation. Here is how to do it safely.
What you need:
- A flashlight (a headlamp is even better, so both hands stay free)
- A ruler or tape measure
- Your phone for photos
Safety first:
- Only step on the joists or on plywood decking. Never step on the insulation or the drywall between joists. You will go through the ceiling.
- If the attic is excessively hot (summer), do this in the early morning or wait for a cooler day. Heat exhaustion in an attic is a real thing.
- If you see signs of heavy animal contamination, droppings, nesting, or strong odor, do not disturb the material. Back out and call a professional. The health risks from aerosolizing contaminated insulation are documented by the CDC.
What to check:
-
Measure the depth. Stick a ruler into the insulation at several points across the attic. If you are measuring 6 inches or less, the attic is likely shallow enough to cause comfort and energy problems. Final targets should come from an inspection, not a blanket R-value assumption.
-
Check for joist visibility. If you can see the tops of the floor joists above the insulation, the coverage is too thin. Insulation should be level with or above the tops of the joists. Visible joists mean the insulation is not providing continuous coverage, and the joists themselves become thermal bridges that conduct heat.
-
Look for gaps and bare spots. Check along the eaves (the edges where the roof meets the exterior walls), around penetrations (pipes, wires, light fixtures), and at the attic hatch. These are the most common locations for missing or displaced insulation.
-
Check for moisture and staining. Dark spots, water marks, or areas where the insulation looks matted or clumped indicate moisture problems. Look at the roof sheathing above the insulation as well. Dark staining or visible mold on the underside of the roof deck can indicate condensation issues.
-
Look for animal evidence. Droppings, tunnels, nesting material, chewed insulation, and urine staining all indicate wildlife has been present. Pay particular attention to the perimeter and corners of the attic, which are common entry and nesting areas.
-
Assess overall condition. Is the insulation uniform and fluffy, or flat and compressed? Does it spring back when lightly pressed, or does it stay flat? Does it look like a continuous blanket, or is it patchy with thin spots?
If your inspection reveals any combination of the signs described above, insufficient depth, visible damage, moisture, animal evidence, or coverage gaps, you are looking at insulation that is not doing its job.
What does professional insulation replacement involve?
When insulation needs to go, the job involves more than pulling out the old material and rolling in new batts. A proper insulation replacement follows a specific sequence, and each step matters.
Step 1: Removal of existing insulation
All old insulation is removed using industrial HEPA-filtered vacuum equipment. This captures the material, along with any dust, debris, and contaminants, without dispersing particles into the air. The material goes directly into containment bags for disposal.
For contaminated insulation (animal damage, mold), the removal process includes additional containment and decontamination steps.
Step 2: Attic floor inspection and remediation
With the insulation out and the attic floor fully exposed, the crew inspects for issues that are invisible when insulation is in place: moisture damage to sheathing, mold, structural concerns, and the condition of the attic floor itself. Any issues are addressed before new insulation goes in.
Step 3: Air sealing
This is the step that separates a professional insulation job from a DIY roll-out-some-batts project. Every penetration in the attic floor is sealed: pipe chases, wire holes, recessed light housings, top plates of interior walls, HVAC boots, exhaust fan housings, and the attic hatch perimeter.
The Department of Energy identifies attic floor air sealing as one of the single highest-impact energy efficiency improvements a homeowner can make. Sealing these penetrations stops the stack effect (warm air rising through gaps into the attic in winter, conditioned air being pulled out in summer) and prevents the air exchange that carries dust, allergens, and contaminants between the attic and the living space.
Air sealing is dramatically more effective when done with the attic floor exposed during an insulation replacement than when trying to seal around existing insulation. This is the best and often the only practical opportunity to do it right.
Step 4: Installation of new insulation
Fresh insulation is installed to the depth and coverage the existing home actually needs. The clean, sealed attic floor provides the ideal substrate for new insulation to perform at its full rated R-value, something that old, compressed, or contaminated insulation sitting on an unsealed attic floor was not delivering.
Ideally, removal, inspection, air sealing, and new insulation installation are coordinated under one written plan rather than split across multiple contractors with vague scheduling windows.
Frequently Asked Questions
How do I know if my insulation is bad without going into the attic?
Can I just add more insulation on top of what is already there?
What R-value should my attic insulation be in New Jersey?
How long does an insulation replacement take?
The Bottom Line
Attic insulation is not glamorous. Nobody gets excited about fiberglass batt depth or R-value charts. But it is one of the few home improvements that pays for itself through lower energy costs, and in New Jersey where utility rates are among the highest in the nation, the payback is faster than most homeowners expect.
The five signs are straightforward: climbing energy bills, uneven temperatures, visible damage, animal contamination, and pre-1990 installation that has never been upgraded. If you are seeing two or more of these, the insulation has almost certainly reached the end of its useful life.
Start with the 15-minute attic inspection described above. If what you find matches the warning signs in this guide, the next step is a professional assessment to determine the work needed.
Last Updated: April 2026
On this page
On this page
- Why does attic insulation fail?
- Sign 1: Your energy bills keep climbing
- Sign 2: Rooms are different temperatures
- Sign 3: You can see the insulation is damaged
- Sign 4: Animals have been in the attic
- Sign 5: Your home was built before 1990 and has never been upgraded
- How to check your attic insulation yourself
- What does professional insulation replacement involve?
- Step 1: Removal of existing insulation
- Step 2: Attic floor inspection and remediation
- Step 3: Air sealing
- Step 4: Installation of new insulation
- Frequently Asked Questions
- The Bottom Line